In an attempt to blog more regularly I have come up with a challenge for myself for the month of March. Starting tomorrow on the 1st of the month my goal is to create at least one new card each day for the whole of March, and share my creations on here with everyone. By the end of the month I should have at least 31 cards!
I'm excited to see what I can come up with and whether having a target will have an adverse effect on my creative juices! We'll have to wait and see. Following a recent trip to Michaels craft store and ith my bulging drawers of crafting supplies It will be good to put them all to use and see what I come up with.
Do you fancy joining me on my challenge? you could get all your cards for the year made in one month!
Monday, February 28, 2011
Card Making Class - Pretty Fairy Card
I thought that I'd share the creative process of making some of my cards and record each of the steps that I take in creating each of my hand made cards.
Today I started off with selecting a packet of stickers that I purchased from Michaels the other day. I took my color pallet from the colors found in the fairy stickers and chose a tangerine orange envelope, powder blue cardstock, shimmering orange paper and a pink and orange check patterned paper.
I started by folding and cutting my blue cardstock to the right size to fit my envelope. I cut the card using a guillotine. I then cut the orange paper, check paper and shimmer paper to size. To attach the layers i use sticky tabs that I cut into three and place along the edge of each piece as shown below. Then the layers of paper are added to the card.


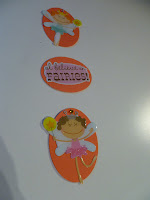
Once the main part of the card was made, I began on the decoration. To mount the fairy stickers onto the card I cut out three small ovals using a creative memories cutting system. I placed the fairies on the larger ovals and the 'I believe in fairies' on the smaller one. To attach them to the card I used 3d foam tape cut into small pieces on the back.
To complete the card I added a tangerine paper insert, using the guillotine to cut the paper to size, and attached it inside the card with some more sticky tabs. I used a rubber stamp and pink ink pad to stamp the sentiment 'Happy Birthday' inside and decorated it with the remaining stickers.
Finally I put a sticker with my website on the back of the card and place it in a cello protective packet to keep it in perfect condition until it gets sold.
I hope you found this useful and that you get some ideas to make your own cards.
Labels:
card class,
cardstock,
crafts,
liz felgate crafts,
paper,
stickers
Thursday, February 24, 2011
New Custom cards
I love making all kinds of cards, especially when someone asks me to make a custom card for them. this week I've made three custom cards including a beach themed 50th birthday card, a fashionista's 30th birthday card and a dog lovers birthday card.
 What fashionista doesn't love shoes, dresses, purses and pearls? I used stamps to decorate the background of the card and made 3d dresses and shoes to decorate the card.
Here's what I created for each of them.
A fun beach theme card complete with glistening sand and a bright and cheery '50'. A fun polka dot bikini and flipflops complete the card.
 What fashionista doesn't love shoes, dresses, purses and pearls? I used stamps to decorate the background of the card and made 3d dresses and shoes to decorate the card.
Labels:
beach,
custom cards,
french bulldog,
handmade cards,
liz felgate crafts,
pug,
shopping
Subscribe to:
Comments (Atom)


